Showing posts with label free crochet pattern. Show all posts

Thursday, February 5, 2015

Make Bright Crochet Coasters! How to!


Okay I know what you are all saying. "Neon is so last year..." Well. At risk of being "off trend" I've been using up this left over builder's line (or brick line) to make sturdy bright flower coasters for our up coming school fete. And no matter what the "trendmeisters" say, I think they are pretty swisho. Good for outdoors, easy to clean, cheap and cheerful.
 
You can buy brick line at the hardware store and it's very economical for crafting. And for those who can't face pink, orange or neon yellow, other hardware string is available in different colours!


1. I use a 3.50 hook. Begin with a magic circle. (I find a chain stitch foundation ring too bulky)Make a ring and slip stitch through. Then chain 3. This acts as your first treble. Then 15 treble into the ring and join with a slip stitch in the third chain of the first 3 chain treble. Pull the magic ring tight.


2. Chain 3. Again this acts as your first treble. Chain 2 (which makes 5 chain in a row) then treble into same place as you began. This creates a little triangle. skip the next stitch then *1 treble 2 chain 1 treble* into next stitch. Repeat * * around the circle then join with a slip stitch into the third chain of the first three chain mock treble.  You should have 8 2 chain spaces (or triangles)


3.Slip stitch into the 2 chain space and then chain 3 (yep, you guessed it, it acts as your first treble). Then treble into the space, chain 1, 2 treble into the same space then 1 double crochet into next stitch. Now you are creating scallop petals. Continue around in this way - *2 treble, 1chain, 2 treble then double crochet into next stitch.*


4. In the last row you don't need to start with a 3 chain treble. Simply do 3 trebles into chain space from the previous row, then 1 chain and 3 treble into the same space, then 1 double crochet into next stitch (the double crochet from the previous row) continue around with *3 treble I chain 3 treble in chain space and 1 double crochet in next stitch and then slip stitch into top of first treble. And fasten off! Use a large tapestry needle to thread through your ends.


Now get yourself a drink and get out into the sunshine!


Friday, December 19, 2014

Christmas Garland with Crochet Words! How to

This was relatively quick. There's still time.Do you have an odd ball of cream/white wool and one of red? A crochet hook?


I crocheted the stars from this pattern - I found them to be wonderfully quick easy and a bit addictive once i had the knack.

The letters are from a Handy Kitty free pattern HOWEVER - with 8 ply wool and a 3.5mm hook I found them to be a little too eensy weensy small so I changed the pattern ever so slightly.

"J" 
1. chain 14 
2. turn and work one slip stitch in each of the next 6 chains (7 slip stitches in all.
3. insert hook in next chain and pull through loop, insert in next chain and pull through loop (3 stitches on hook) then wool around the hook and pull through all three stitches on the hook (this makes the bend in the J)
4. slip stitch in the remaining 4 chains and slip stitch into the start chain and fasten off.

"0" 
1. chain 15 and join with a slip stitch in the 1st chain
2. work 1 slip st in the next chain, 2 slip stitches in the next chain and repeat this pattern. 
Join with a slip stitch into 1st chain. Fasten off

"y" 
1.chain 5, turn and work 1 slip stitch into second chain from the hook, 1 slip stitch  in each of the next 3 chain
2. chain 6, turn and work into the 2nd chain from the hook, 1 slip stitch in each of the next 4 chain
3 chain 5, turn and work 1 slip stitch into 2nd chain from hook, 1 slip stitch in each of the next 3 chains. join with a slip stitch in 1st stitch of step 1. Fasten off.

The worst bit is sewing in the ends.

I then made some little fork pom poms.To make a loop for attaching to the garland I tied the ends in a knot over the hook making a little elevated loop.

Next: Plan out your garland.
Then grab your wool and hook: 

1.
To make up the string, chain 12 and join with a slip stitch in the first chain,  creating a loop for hanging the garland

2.
chain 14 (or less of you want you dangly bits closer) and join your first dangle piece (star or pom pom) with a slip stitch through the top of the star or the loop of the pom pom.

3.
continue with 14 chains between stars and pom poms.

4.
when it comes to the word I found it easier to work the whole garland backwards - 

with the "Y" first. 
slip stitch into the top of the y, chain across the gap (around 4 chain)then a slip stitch into the top of the next arm of the "y" 

5.
chain across 6 chain and join with a slip stitch across three slip stitches at the top of the "O"

6.
chain 6 then slip stitch into the top of the "J" 

7.
continue with the 14 chain gap between dangly bits alternating stars and pom poms.

8.
finish with 14 chain then create the loop - 

9.
12 chain and back into the 11th chain from the end to create another loop.

Fasten off

Sew in pom pom ends and string ends.

Stretch the garland chain or press with an iron if you like.


Hang it up! Gift it! 

Or make the letters and stick to a card. Crochet alphabet garlands are pretty exciting! It opens a world of possibilities for funny quotes and song lyrics. I'm possibly a bit too excited.

Thursday, December 11, 2014

Christmas Crochet Round up!

It's not too late to whip some of these up.

Here's some free patterns and tutorials for lovely hand crocheted ornaments.

My sister made me some of these last year and I love them. Here's a free tutorial on craft stylish


Miniature delicate hearts from craft penguin

And it's worth having a squiz at slugs on the refrigerator website - for ALL THINGS CROCHET.
But for now - the ornaments. 


 And from whiskers and wool blog we have:


0

Get hooking....

Wednesday, May 14, 2014

free crochet pattern round up! Ponchos and capes!

It's getting chilly round these parts and I want a crocheted poncho or cape. I had a cape a few years ago but it looked so much better on my teenage daughter that I relinquished it to her wardrobe. So now I've been searching for free patterns to make a replacement one and here are the best I have found.
For groovy girls this on can be found here but I should warn you that the site is full of fantastic vintage patterns and you may be distracted for some time....

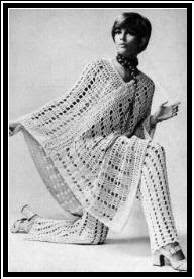
For example, from the same website! What says GLAMOUR more than a FABULOUS poncho with MATCHING pants????  Your link to looking like this is only a CLICK away....

And while we are on that website - did you ever consider the versatile nature of a poncho (I know I have!) It can be a poncho....or a skirt! You could probably even wear it on your head!


Here is the pattern for this glorious pineapple lace poncho/skirt

Here's more for the little girls. This Little Red Riding Hood capelet is upping the cute factor somewhat. The pattern can be downloaded for free from Red heart
http://www.redheart.com/free-patterns/red-riding-hood-wolf
And this cape "for a princess" is also from red heart - download and print! I do love a cape with a collar. For a short cape or "capelet" I like this one.
This ripple pattern capelet could be made in chevron stripes for a more modern look and the pattern is from Suzie's Yarnie Stuff Blog


I'm thinking of making this one with the matching beret. Pattern can be found here on all crafts blog.

For some quick short capes and ponchos look no further than the free patterns on Lion Brand. You do have to register to get the patterns. Here are some of my favourites I found there.

 The "round yoke poncho" Pattern #: L10716

 The "Split collar capelet" Pattern #: L32421


For all you Australian crochet people you will need to convert the pattern.  Here are all the conversions you should need! Get hooking! 

Here is a hook conversion table:

Crochet Hook Conversion Chart
MetricUSA  UK  
2.00 mm - 14
2.25 mm1 / B13
2.50 mm-12
2.75 mmC11
3.00 mm - 11
3.25 mmD10
3.50 mm4 / E9
3.75 mmF-
4.00 mm68
4.25 mmG-
4.50 mm77
5.00 mm8 / H6
5.50 mm9 / I5
6.00 mm10 / J4
6.50 mm10 1/2 / K3
7.00 mm-2
8.00 mm-0
9.00 mm15 / N 00
10.00 mm P 000
15.75 mm or 16mm Q -
Steel Hook Chart (thread hooks)
MetricUSA UK 
.6 mm146
.75 mm13-
.70 mm125
.8 mm11-
1 mm104
1.15 mm9-
1.25 mm83
1.50 mm72.5
1.6 mm6-
1.7 mm5-
1.75 mm42
1.85 mm3-
1.95 mm2-
2 mm11
2.25 mm000
3 mm00-

Here is a stitch conversion table:
USUK
chain(ch)chain(ch)
single crochet (sc)double crochet (dc)
double crochet (dc)treble (tr)
half double crochet (hdc)half treble (htr)
triple crochet (trc)double treble (dtr)
slip stitch (sl st)slip stitch (sl st)

And here are some tips for wool weight conversions. Worsted weight translates to Australian 10 ply. DK weight is 8 ply and Sports weight is 5 ply.  

Standard Yarn Weight SystemNm (length per mass, SI (International System of Units))Yarn Type (US)Ply (UK, NZ, AU)[3]m/100gWraps Per Inch (WPI)[3]needles / circulars recommended, mm
0 or Lace6 - 8Thread, Cobweb and Lace1 - 3 ply600-80018+ wpi1.5 - 2.5
1 or Superfine4 - 6Fingering, Sock4 ply400-48014 wpi2 - 3
2 or Fine3 - 4Sport5 ply300-40012 wpi3 - 4
3 or Light2.4 - 3DK8 ply240-30011 wpi4 - 4.5
4 or Medium1.2 - 2.4Worsted10 ply120-2409 wpi4.5 - 5.5
5 or Bulky1 - 1.3Bulky12 ply100-1307 wpi5.5 - 8
6 or Super Bulky>1Super Bulky
Less than 1005-6 wpi>8

Monday, May 5, 2014

Free Crochet Cardi Pattern

Is it official yet? Is it officially cold? Should we pack away our sandals and our shorts? Sadly, I think so.
I am NOT a winter person. BUT! I am a crafty wool person and the cold weather does inspire the hook and needles to come out and get hooking and click clacking.


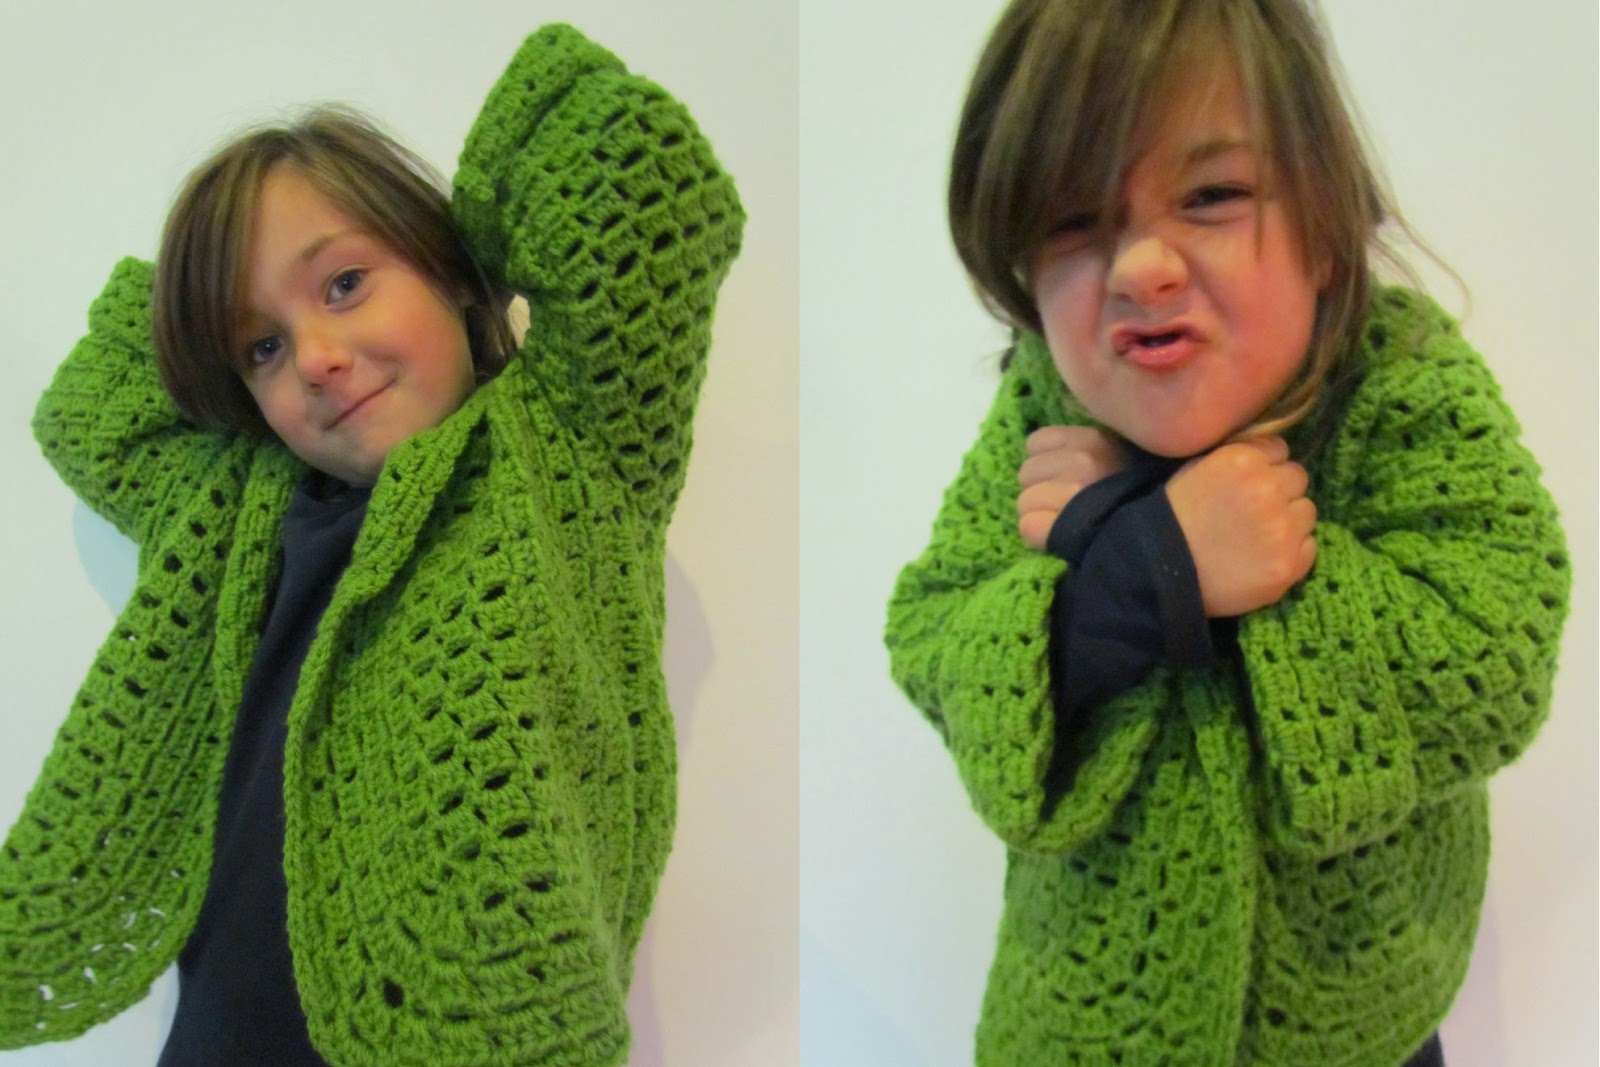
Here is a free pattern from lionbrand called "Flutter Baby Top"(You will need to make register with them to access their free patterns but it's worth it. There are heaps!)This jacket/cardi all made in one piece. Nifty huh?

The pattern is for sizes 3 months up to 4 years: made with Babysoft 5 ply and a 3.25 mm (or US F-5) (see picture from the pattern below) 
TO MAKE IT BIGGER: I used 8 ply and a a size 5 mm hook or (US  H-8) to make it for my daughter who is 6 years old. I added some rows to the length which I found was easy thanks to the diagram. It worked a treat!


(and its also fits me as a little 3/4 sleeve bolero.)
What woolies are you making for winter? Or are you in the Northern Hemisphere and crocheting cotton?


CROCHET HOOK SIZES AND CONVERSIONS
METRIC SIZES(mm)US SIZES UK/CANADIAN
2.0-14
2.25B/113
2.5-12
2.75C/2-
3.0-11
3.25D/310
3.5E/49
3.75F/5-
4.0G/68
4.577
5.0H/86
5.5I/95
6.0J/104
6.5K/10 1/23
7.0-2
8.0L/110
9.0M/1300
10.0N/15000

Tuesday, August 13, 2013

free crochet dress patterns

Here are some quick links to free crochet dress patterns I have found
This great vintage pattern for matching Mother and Daughter dresses


 This gorgeous round yoke dress from Bernat

A sweet Spring daisy dress from crochet today

This gorgeous modern t-shirt dress from pardon my chaos

 
And a lovely granny stitch baby dress from days of yarning 
 
I'm almost finished this dress from a free pattern
which is for one twin and I need to choose another to make for the other twin...and with Spring not so far away I'd better get busy because I'd like to crochet dress for myself as well!

Tuesday, August 6, 2013

Playlist

Making - this crochet dress

Free pattern here.

Reading - Restoration by Rose Tremain.

Have enjoyed other Rose Tremain books, especially "Music and Silence" and "The Colour". 


Watching - Broadchurch on ABC iview. It's a fine English production which relies heavily on the high quality performances of Olivia Colman and David Tennant. Despite an overuse of focus pulls and fancy arty-farty camera tricks (as a former film student it kind of drives me batty!), I'm enjoying the emotional pull of this story.

Listening - Hardcore History podcasts 
These are terrific history lessons that are in no way boring!
'In "Hardcore History" the very unconventional Dan Carlin takes his "Martian", outside-the-box way of thinking and applies it to the past.'

Wearing - bobby socks and t-bars.

What's on your playlist this week???

Monday, July 1, 2013

fingerless mittens?


Fingerless mittens....well it's a funny phrase isn't it? Because, technically,all mittens are fingerless - and with these ones  you can see fingers!Confused? Hmmm. Let's call them hand warmers!!!!

I've been making them by the dozen. Literally. I've adapted a few patterns to come up with this quick easy pattern.


Hand warmers pattern

50 g 8 ply wool Size 4.5 mm (7) hook

SMALL: Chain 30 and join with slip stitch. (MEDIUM chain 33, LARGE chain 36)

Row 1: Ch 2 (for first half treble) 1 half treble in each chain around the ring. Join to the chain half treble with a slip stitch.

Row2: sl st into half treble space. Ch 3 (for first mock treble) then tr into same space, ch 1 then 2 tr into same space. 1 shell made. Skip 2 ch, tr into next ch, skip 2 ch and shell (2 tr 1 ch 2 tr) into next ch. Continue in this pattern to the end. (5 shells) (MEDIUM AND LARGE FIT 6 SHELLS AROUND – doesn’t matter if you squeeze it in at the end)
Sl st into the 3rd ch of 1st mock tr

Row 3: Sl st into ch sp in shell. Ch3 (for first mock tr), 1 tr into same space, 1 ch and 2 tr into same space (a shell made)1 tr into top of 1 tr from the prev row. Continue around.

NOTE: if you want a longer cuff, insert more rows here before the increase.

Row 4: Increase row. Sl st in ch sp of shell. Ch 3 (1st mock tr) 5 tr into same space.1 tr into the top of previous row single tr, then shell (2 treble, 1 chain, 2 treble) into shell ch sp. Cont. pattern around the row. Join with slip stitch in 3rd ch of 1st mock tr

Row 5: Sl st in space between 2nd and 3rd tr. Ch 3 (mock tr), 1 tr 1 ch 2 tr  into same sp (1 shell made) ch 1 skip 2 treble then shell (2 tr 1 ch 2 tr) into space between 4th and 5th tr from increase. 1 tr into single tr from previous row, shell into space between shell from previous row. Continue pattern around. Join with a slip stitch into 3rd ch of 1st mock tr.

Row 6: sl st into shell sp. Ch 3 (to be 1st tr) 1 tr into same space, 1 ch 2 tr into same space (shell made. ) I tr into space between the 2 shells from previous row. Continue pattern around.


Continue in this pattern for at least 3 rows. If you want a longer thumb piece then do 4 or 5 rows.

Row 9: *Create the thumb: Ch 3. Skip 2 shells and join to the next single tr creating a space for the thumb. Ch 3 ( mock tr in the next row) and continue around, shell into the shell space from previous row (2 tr 1 ch 2 tr) until you get to the edge of the thumb space,ending with 1 tr. 
Skip one ch of the thumb divide, 1 shell in next ch, skip one ch and  join with a sl st in the 3rd chain of the first mock treble.

Row 10: Ch 3 (for 1st tr) Shell into the next shell space and continue around until the edge of thumb space, ending with the 1 treble.  Skip 1 treble, 2 treble in the next treble space, 2 tr in the next tr space, join with a slip stitch to the 3rd ch of the first mock tr.
You can finish off here for a short mitten or continue for a few more rows for a longer mitten.


You can finish off here for a short mitten or continue for a few more rows for a longer mitten.


Happy making! I will have this pattern as a hand out at my market stall next Saturday at the Winter Artisan Market at Northcote Town Hall, 10 am - 4 pm or you can buy a pair I have made for $20!