Showing posts with label Christmas presents. Show all posts

Monday, December 17, 2012

Keeping Christmas Eco - recycled sushi packet garland and bracelet


Save the little soy sauce fish from take away sushi! They make a lovely window garland or would look great hung individually on the tree. We filled them with water coloured with food colouring and painted the tops with different coloured nail polish.

 And save the packet too. Why? Well, sushi containers are perfect for shrinky dinking. My daughter Mattie made this (Kesha themed) charm bracelet for her sister. The diamond charms are sushi packets (the rest is shrinky dink frosted plastic that you can buy from a craft store.) Mattie drew on the plastic with a sharpie pen and used a hole punch to make the hole. Then into a very slow oven and watch it shrink and thicken. You can place something flat on top when it comes out of the oven to ensure it doesn't curl.

And while we were shrinky dinking, we made these snowflake bauble necklaces for the twins. Blue pencil on frosted shrinky dink.


Tuesday, December 20, 2011

Last thing......birthday beads for my sister...


Fabric bead necklaces.

To make:

13 wooden beads (mine were 2 cm)
Light weight fabric
Spacer beads with large holes (If you haven't got these you can put knots between the beads)
Sewing machine/over locker.

Cut a length of fabric 12 cm wide and 120 cm long. It can be shorter than this - 1 metre is good too. For smaller wooden beads 1 cm wide, make the piece narrower, say 8 cm. You're just allowing for the bead to fit easily and a seam.

Fold right sides together and sew along the edge. I use an over locker for this.

Fold your casing out to the right side. This can be a bit fiddly.  I used a knitting needle to help.

Cut the ends on a diagonal - this helps if threading spacer beads on.

Slide on your spacer bead 20 cm from the end.  Then put the wooden bead inside the casing. Follow this with a sliding a spacer bead on to keep the wooden bead in place. Alternatively, tie a knot.

Repeat until you like the look of it. I used 13 beads on one, 11 on another and 18 on another so , basically, I make it up as I go along. You can trim the ends to make them even.

Fold in the unfinished ends to hem and hand stitch.


Down tools now. Off to the post office!

How the wind up wound up....


Winding embroidery yarn around things turned out to be a fairly calm and therapeutic Christmas craft....slowly winding, winding....not much brain power required....


The hair combs look lovely in the hair. I also bought some really large sturdy combs and covered them too - forgot to take pictures before I wrapped them.

Anything else I can wind yarn around??I like it. My eldest daughter has been making combs for friends this year too.  We wind together.


Is it a wrap yet?

Present for my nephew Conrad

Check out this bit of razzle dazzle at aesthetic outburst and at one pearl button

Are you all wrapped up?

Monday, December 19, 2011

Magnetic Paper Dolls

One Pearl Button's Magnetic Paper Dolls
I found the idea for making magnetic paper doll sets over here at one pearl button (A great blog for ideas and links!)and published in this great DIY Christmas guide here...
But of course these do not have to be magnetic. Just printing the dolls on good strong paper would make an excellent gift. Especially for older children - then they get the fun of the cutting out as well.

And when I went looking for paper dolls I found there are many amazing ones out there ready for printing out - everything from anime cartoon characters to Jane Austen characters! And even Sonia Delaunay inspired paper dolls!

Here are some links:
Teri's Paper Doll scans.
That Girl
Friends around the World
Sonia Delaunay
The Ginghams
Ziegfeld Girl
Historical Costumes


I chose "That Girl" because we used to love the show and I wanted to make these for one of my sisters.
I also made the Ginghams and Betty McCall's fifties dolls (Although I enlarged these ones before printing)

Here are my tips so you can learn from my mistakes!

1. Make sure you have printed the right costumes for your doll - there were several "That Girls" to choose from and only some outfits fit the one I chose. Oops!

2.Cut your paper shape out first not quite to the line. This way you have an easier time sticking it down on the self adhesive magnetic sheet - because once it is stuck...well...it's stuck! Trim it after you stick.

Saturday, December 17, 2011

sticky hand prints?

Here's a present for the kids to make...with some help of course...well, in all honesty they hardly do any of it! All they do is to provide the starting artwork. And annoy you while you try and do the rest. And make a mess. Hey, but it was fun. No. Really! 
So! Here's a present idea for you to make on behalf of your children...
Get the kids painting...(this is optional!) and while they are all mucky (this is also optional!) paint the kids hands and print them.(Not optional!)
When they are dry, cut them out (with a bit of extra space around the hand for trimming later). You can write the child's name and date on it as well if you like.
Stick them onto the self adhesive magnetic board and cut around.
Cover with clear contact if you want to make them water proof.

Some sticky fingers to leave at someone else's house! Lord knows there's enough mucky finger prints at this house already without needing the magnetic decorative kind as well! A good present for Grandmothers and Kinder teachers?

Tuesday, December 13, 2011

I'm sticking with you...


How to make patchwork hexagon fridge magnets and fridge bunting with the left overs

Gift making tutorial

You will need:
fabric(smallish scraps) 
iron
needle and thread
craft glue
scissors
stanley knife (optional)
pen/pencil
hexagon template (provided below) 
cardboard/old box
magnetic sheet 6mm thick (self adhesive optional)
 

I used this block from the kids play set to cut around -it's sides measure 2.5 cm - but I have provided the same sized template here.

You may want to stick it onto some thick card for multiple uses.


Cut out hexagon from card with stanley knife or trace and use scissors.


Iron your fabric and cut your fabric out roughly around the hexagon with an overlap.


Fold and glue the fabric, keeping it tight around the card

 OR


stitch in place as you would for patchwork - which I found faster, easier and less mucky!
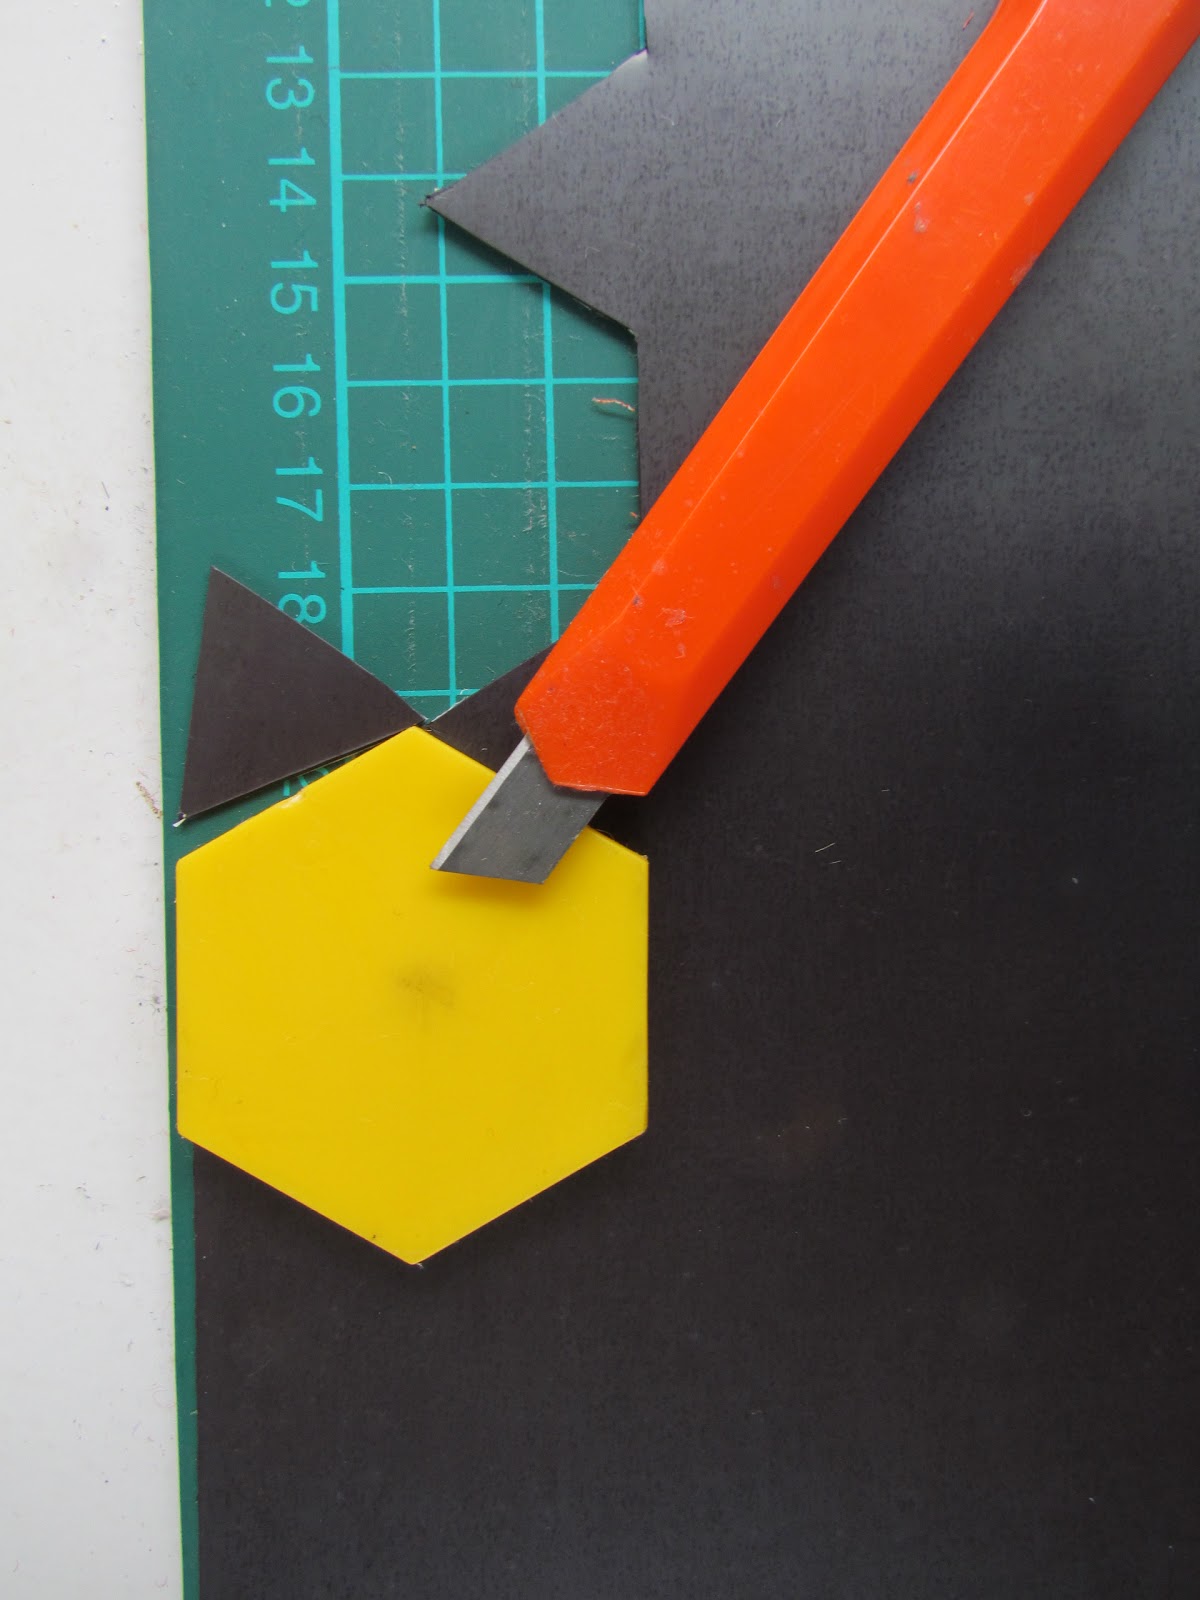
Just a stitch in each corner. You can spray the card with a little spray adhesive for the fabric to stay still.

Trace around your hexagon on the magnet sheeting. I used a stanley knife to score the  sheet then cut through with scissors. If using the self adhesive sheets, cut on the "wrong" side - the black side- as the white side is really slippery.


Iron the covered hexagon to get it really flat.Peel paper from adhesive or apply a thin layer of craft glue.

 Stick on the covered hexagon!


Make six for a flower


They look sweet on a stainless steel fridge too, trust me! 


It didn't photograph so well.

I found I had left over magnetic sheet triangles...hmmm...well.. it was obvious wasn't it....magnetic fridge bunting!!


Cut your fabric to size around the triangle.

Peel and expose sticky side (or apply thin layer or glue.

Place length of ric rac or thin ribbon across the triangle.(I used mini ric rac)

Apply glue to the ric rac so the fabric sticks over it.

Place fabric carefully on triangle.

Repeat, attaching the ric rac/ ribbon to the next triangle...and so on....

Make it as short or long as you like!

Happy gift making!

Saturday, December 10, 2011

Winding up to Christmas


Bangles and hair combs decorated with embroidery yarn - simply wound around.
The bangles took almost 5 skeins. I glued the start piece and end of the wound yarn. The hair comb looks really pretty in hair. I think I remember doing these in the eighties with ribbon and adding some fake rose buds?
For stripes I cut my yarns to length after measuring by winding around to see the width of stripe I wanted. Then I just kept winding. It was strangely therapeutic. Simple. Calm. Will be making more for my nieces!