Showing posts with label tutorial. Show all posts

Friday, September 18, 2015

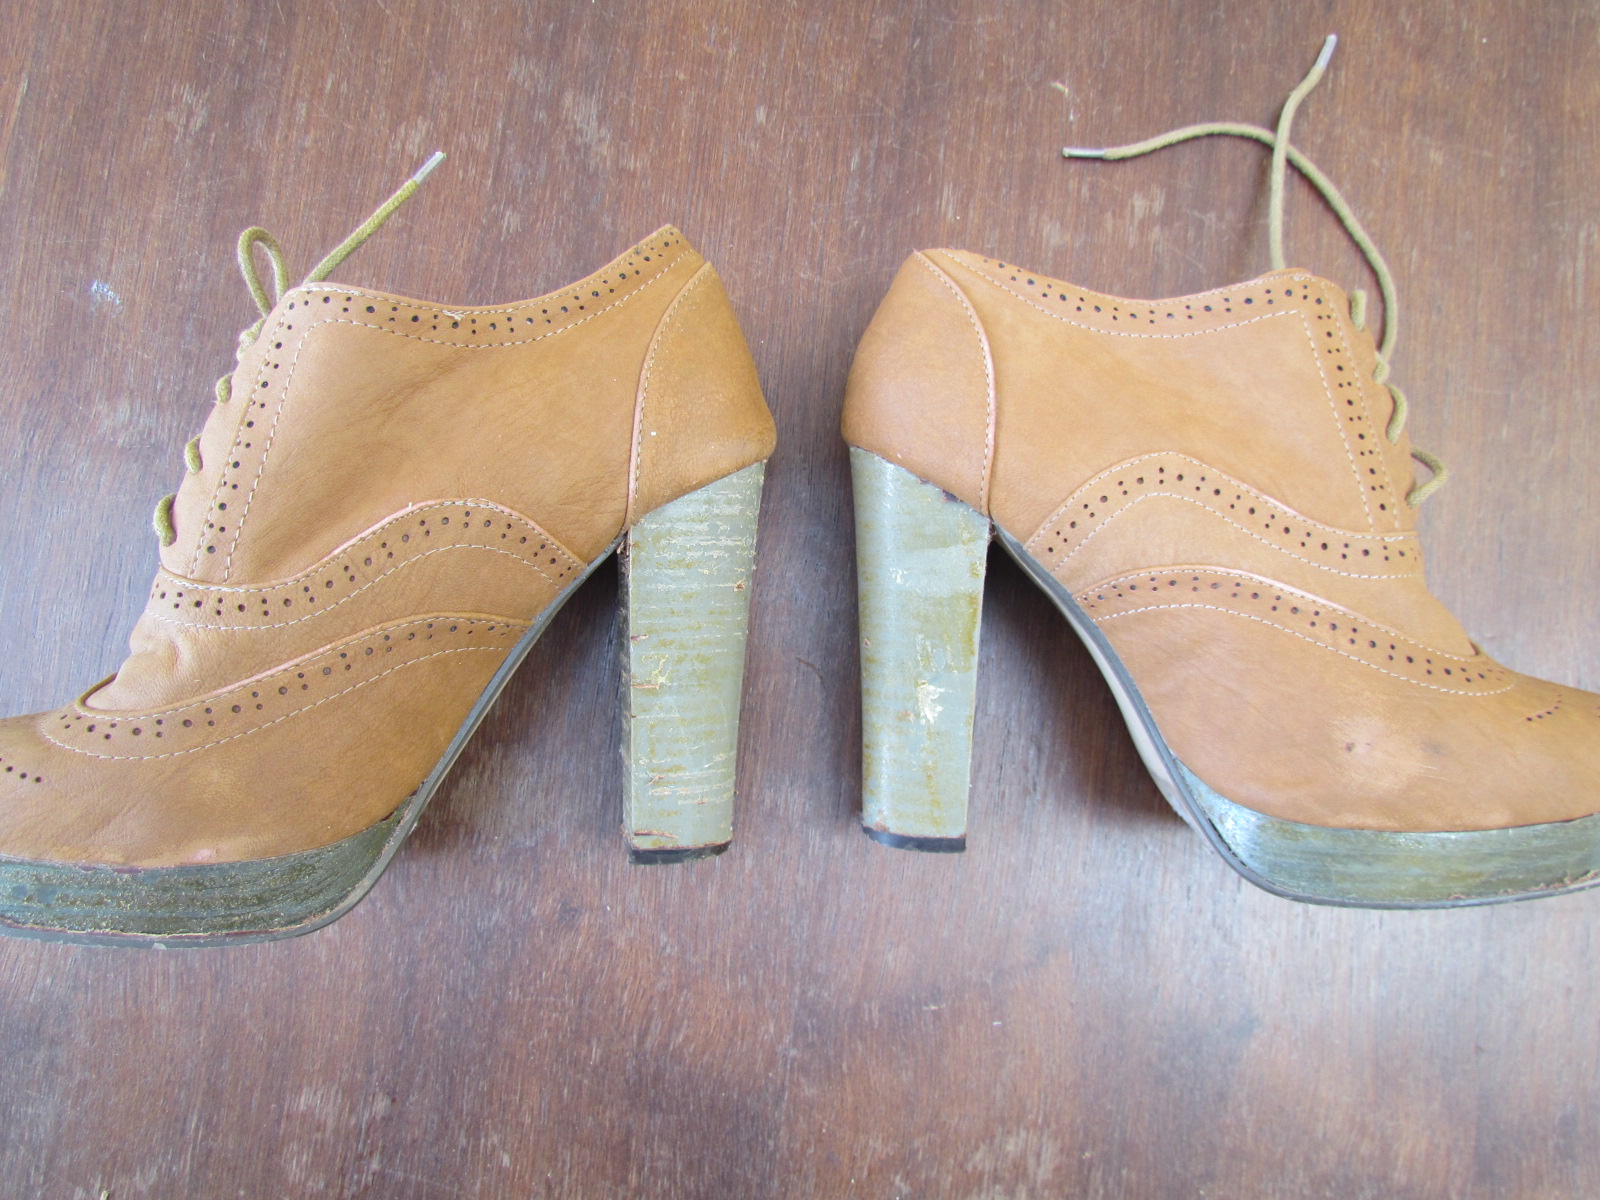
Cheap Shoe Revamp

Or how to make your shoe go from this...

to this!


The bad thing about cheap shoes - they fall apart.


 These faux suede brogues from the op shop started shedding the fake wood heel on the first wear.  Oh well - I didn't like the colour ( or lack there of) anyway.

And the good thing about cheap shoes...is that you can experiment on them!
I peeled off the fake wood veneer heel ( pretty easy as it was practically evaporating off!) and then I stuffed them with newspaper painted the suede with acrylic paint..it tool a few layers and I really massaged the wet paint into the surface...


and finished them off with some spray clear sealant....

and gold heels...because I had gold paint...but may change it....it's only paint!

What do you think?

Monday, June 15, 2015

an UN-TUTORIAL for pom pom head piece

Do you like my pom pom head piece? Or do I just look like my woolly brain is exploding from my head (yes I feel like my brain IS made of fluffy pom poms sometimes..)

Here's how I made it  - although it's so basic I'm not sure I should even be giving instructions. It's an untutorial!
 
You will need:
 scraps of wool
a trusty pom pom maker
 and a hair comb.
 
1. make pom poms I made two different sizes and I also made a heap of them so I can do different colour combinations.
 
2. Use the wool around the centre of the pom pom to tie to the thick end part of a hair comb.
 
3. Stick it in your hair
 

It makes a good change from flowers...and it's woolly and warm for winter.

Thursday, February 5, 2015

Make Bright Crochet Coasters! How to!


Okay I know what you are all saying. "Neon is so last year..." Well. At risk of being "off trend" I've been using up this left over builder's line (or brick line) to make sturdy bright flower coasters for our up coming school fete. And no matter what the "trendmeisters" say, I think they are pretty swisho. Good for outdoors, easy to clean, cheap and cheerful.
 
You can buy brick line at the hardware store and it's very economical for crafting. And for those who can't face pink, orange or neon yellow, other hardware string is available in different colours!


1. I use a 3.50 hook. Begin with a magic circle. (I find a chain stitch foundation ring too bulky)Make a ring and slip stitch through. Then chain 3. This acts as your first treble. Then 15 treble into the ring and join with a slip stitch in the third chain of the first 3 chain treble. Pull the magic ring tight.


2. Chain 3. Again this acts as your first treble. Chain 2 (which makes 5 chain in a row) then treble into same place as you began. This creates a little triangle. skip the next stitch then *1 treble 2 chain 1 treble* into next stitch. Repeat * * around the circle then join with a slip stitch into the third chain of the first three chain mock treble.  You should have 8 2 chain spaces (or triangles)


3.Slip stitch into the 2 chain space and then chain 3 (yep, you guessed it, it acts as your first treble). Then treble into the space, chain 1, 2 treble into the same space then 1 double crochet into next stitch. Now you are creating scallop petals. Continue around in this way - *2 treble, 1chain, 2 treble then double crochet into next stitch.*


4. In the last row you don't need to start with a 3 chain treble. Simply do 3 trebles into chain space from the previous row, then 1 chain and 3 treble into the same space, then 1 double crochet into next stitch (the double crochet from the previous row) continue around with *3 treble I chain 3 treble in chain space and 1 double crochet in next stitch and then slip stitch into top of first treble. And fasten off! Use a large tapestry needle to thread through your ends.


Now get yourself a drink and get out into the sunshine!


Friday, December 19, 2014

Christmas Garland with Crochet Words! How to

This was relatively quick. There's still time.Do you have an odd ball of cream/white wool and one of red? A crochet hook?


I crocheted the stars from this pattern - I found them to be wonderfully quick easy and a bit addictive once i had the knack.

The letters are from a Handy Kitty free pattern HOWEVER - with 8 ply wool and a 3.5mm hook I found them to be a little too eensy weensy small so I changed the pattern ever so slightly.

"J" 
1. chain 14 
2. turn and work one slip stitch in each of the next 6 chains (7 slip stitches in all.
3. insert hook in next chain and pull through loop, insert in next chain and pull through loop (3 stitches on hook) then wool around the hook and pull through all three stitches on the hook (this makes the bend in the J)
4. slip stitch in the remaining 4 chains and slip stitch into the start chain and fasten off.

"0" 
1. chain 15 and join with a slip stitch in the 1st chain
2. work 1 slip st in the next chain, 2 slip stitches in the next chain and repeat this pattern. 
Join with a slip stitch into 1st chain. Fasten off

"y" 
1.chain 5, turn and work 1 slip stitch into second chain from the hook, 1 slip stitch  in each of the next 3 chain
2. chain 6, turn and work into the 2nd chain from the hook, 1 slip stitch in each of the next 4 chain
3 chain 5, turn and work 1 slip stitch into 2nd chain from hook, 1 slip stitch in each of the next 3 chains. join with a slip stitch in 1st stitch of step 1. Fasten off.

The worst bit is sewing in the ends.

I then made some little fork pom poms.To make a loop for attaching to the garland I tied the ends in a knot over the hook making a little elevated loop.

Next: Plan out your garland.
Then grab your wool and hook: 

1.
To make up the string, chain 12 and join with a slip stitch in the first chain,  creating a loop for hanging the garland

2.
chain 14 (or less of you want you dangly bits closer) and join your first dangle piece (star or pom pom) with a slip stitch through the top of the star or the loop of the pom pom.

3.
continue with 14 chains between stars and pom poms.

4.
when it comes to the word I found it easier to work the whole garland backwards - 

with the "Y" first. 
slip stitch into the top of the y, chain across the gap (around 4 chain)then a slip stitch into the top of the next arm of the "y" 

5.
chain across 6 chain and join with a slip stitch across three slip stitches at the top of the "O"

6.
chain 6 then slip stitch into the top of the "J" 

7.
continue with the 14 chain gap between dangly bits alternating stars and pom poms.

8.
finish with 14 chain then create the loop - 

9.
12 chain and back into the 11th chain from the end to create another loop.

Fasten off

Sew in pom pom ends and string ends.

Stretch the garland chain or press with an iron if you like.


Hang it up! Gift it! 

Or make the letters and stick to a card. Crochet alphabet garlands are pretty exciting! It opens a world of possibilities for funny quotes and song lyrics. I'm possibly a bit too excited.

Saturday, November 30, 2013

Don't be scared to cut and alter crochet garments!!!


Well it's not everyday you find a complete crochet suit in mint condition....so much work put into it - beautifully made - of course I had to have it. Alas is was a little bit big, making me look like a saggy baggy Nanna. So I took it in.

I've made crochet garments before from blankets so I have cut and sewn crochet before which probably made me brave enough to tackle this....


As long as you sew it/overlock it/zig-gzag and seal the edges pretty much straight after cutting, you should be okay and not an unravelled mess. Then wear it! Preferably with a pussy bow blouse and big hair.

And as a friend said when she saw me dropping the kids at school, "well, it's not everyday you see someone in so much aqua crochet."

Wednesday, August 7, 2013

EASY recycled jumper beanie tutorial!

My daughter Mattie looks GREAT in a beanie!See?
In fact, everyone this Winter in Melbourne seems to be able to rock the beanie....except me. I look super STOOOOPID in a beanie. Sigh.
But I love making them and selling them at  markets - just don't ask me to model one.

I've been experimenting with recycling jumpers into beanies and here is how I do it.

First - work out your size. Measure your head circumference or check out this hat size chart with all the information you need. Make sure you have a jumper that the front or back is big enough for the measurement for a one seam style OR halve the measurement and cut two pieces from the front and back of the jumper - you can even use the existing jumper seam as a side seam in your beanie.
With the jumper band at the bottom, cut a rectangle the length of the circumference and 22 cm or 8 and 1/2 inches in height.  This jumper was quite damaged so I had to make a small beanie.
Sew the seam together with a straight stitch then bind the edge with a close zigzag. I find over locking destroys the straight egde - as does zig zagging first.

Again, using a close zig-zag, bind the top edge to prevent unraveling.

Now to finish. With a needle and thread (and the beanie inside out) join opposite sides together, halving the gap then halving again. Keep going with joining the top like this until it is sealed.

Turn the right way and add a pom pom. I used a contrasting colour but sometimes it is possible to unpick the jumper you are using to make a matching pom pom.
For a cable knit jumper beanie:
For matching front and back and two side seams, halve the head circumference measurement and cut two matching pieces.
Sew side seams first then join up the top in the same way.

*Oh and don't forget the sleeves - mini baby beanies can be made from jumper sleeves!

Wednesday, December 12, 2012

tassel garland how to

A factory around the corner was throwing away rolls of interfacing - we rescued them from the skip and have used it over the years for pattern making and other things. I wanted to make more tassels but in the spirit of keeping it eco I didn't want to got out and buy anything new!
Here's how I made the tassels....same technique for paper but you don't need the wire....


A friends Mum got married in the 1950's and had bridesmaids in rainbow pastel frocks. That's what i think of when I look at these. Swishing frocks and sugared almonds.