Showing posts with label free pattern. Show all posts

Thursday, April 30, 2015

How to Sew a Simple Poncho

Some Poncho sewing instructions from the
trusty old Golden Hands Craft books:

"The fitted poncho has two seams, shoulder darts and applied fringing. It has a set outline which will keep its shape if made in a firm woven fabric and for extra warmth and firmness you can line it.
You could adapt the poncho by trimming with fur or braid instead of the fringe; by pattern darning a border; by making a 'poncho suit' with skirt or trousers; or by using an exciting furnishing fabric, or casual towelling for the beach."

Hmmm. "poncho suit". Not a phrase you see every day. What do you think? Faster than knitting or crochet. I'm on the look out out "exciting furnishing fabric"!
Thank you, yet again, Golden Hands.


Friday, December 19, 2014

Christmas Garland with Crochet Words! How to

This was relatively quick. There's still time.Do you have an odd ball of cream/white wool and one of red? A crochet hook?


I crocheted the stars from this pattern - I found them to be wonderfully quick easy and a bit addictive once i had the knack.

The letters are from a Handy Kitty free pattern HOWEVER - with 8 ply wool and a 3.5mm hook I found them to be a little too eensy weensy small so I changed the pattern ever so slightly.

"J" 
1. chain 14 
2. turn and work one slip stitch in each of the next 6 chains (7 slip stitches in all.
3. insert hook in next chain and pull through loop, insert in next chain and pull through loop (3 stitches on hook) then wool around the hook and pull through all three stitches on the hook (this makes the bend in the J)
4. slip stitch in the remaining 4 chains and slip stitch into the start chain and fasten off.

"0" 
1. chain 15 and join with a slip stitch in the 1st chain
2. work 1 slip st in the next chain, 2 slip stitches in the next chain and repeat this pattern. 
Join with a slip stitch into 1st chain. Fasten off

"y" 
1.chain 5, turn and work 1 slip stitch into second chain from the hook, 1 slip stitch  in each of the next 3 chain
2. chain 6, turn and work into the 2nd chain from the hook, 1 slip stitch in each of the next 4 chain
3 chain 5, turn and work 1 slip stitch into 2nd chain from hook, 1 slip stitch in each of the next 3 chains. join with a slip stitch in 1st stitch of step 1. Fasten off.

The worst bit is sewing in the ends.

I then made some little fork pom poms.To make a loop for attaching to the garland I tied the ends in a knot over the hook making a little elevated loop.

Next: Plan out your garland.
Then grab your wool and hook: 

1.
To make up the string, chain 12 and join with a slip stitch in the first chain,  creating a loop for hanging the garland

2.
chain 14 (or less of you want you dangly bits closer) and join your first dangle piece (star or pom pom) with a slip stitch through the top of the star or the loop of the pom pom.

3.
continue with 14 chains between stars and pom poms.

4.
when it comes to the word I found it easier to work the whole garland backwards - 

with the "Y" first. 
slip stitch into the top of the y, chain across the gap (around 4 chain)then a slip stitch into the top of the next arm of the "y" 

5.
chain across 6 chain and join with a slip stitch across three slip stitches at the top of the "O"

6.
chain 6 then slip stitch into the top of the "J" 

7.
continue with the 14 chain gap between dangly bits alternating stars and pom poms.

8.
finish with 14 chain then create the loop - 

9.
12 chain and back into the 11th chain from the end to create another loop.

Fasten off

Sew in pom pom ends and string ends.

Stretch the garland chain or press with an iron if you like.


Hang it up! Gift it! 

Or make the letters and stick to a card. Crochet alphabet garlands are pretty exciting! It opens a world of possibilities for funny quotes and song lyrics. I'm possibly a bit too excited.

Sunday, August 31, 2014

Finishing.....

It's been a week of endings. I've finished knitting this child's vest - my first attempt at circular needles.


I finished the book I was reading....


I finished two stories I was writing for a competition deadline (which seemed like a herculean effort in a week with book week dress up, kids playing tag team with gastro and other such committments)...

The footy rounds finish - with the Mighty Richmond Tigers winning a place in the finals!!! - (I listened on the radio with my head in my hands I was so nervous)....


And finally, finally...Winter finishes. 


 I'm not really a knitter. The frippery of crochet suits my flibberty-gibberty ways more. But circular needle knitting is ace! No seams! I got the free pattern here from "Pickles"  (Terrific site for free patterns.)

It's for size 5-6 and I used patons wool jet 12 ply. It was super easy for a novice like me.


It's for a friends little girl who spied the wool the other day and loved the colours. (I also tell myself that if I use up all my wool stash I can justify buying more!)

Now. What to make next?

Wednesday, May 14, 2014

free crochet pattern round up! Ponchos and capes!

It's getting chilly round these parts and I want a crocheted poncho or cape. I had a cape a few years ago but it looked so much better on my teenage daughter that I relinquished it to her wardrobe. So now I've been searching for free patterns to make a replacement one and here are the best I have found.
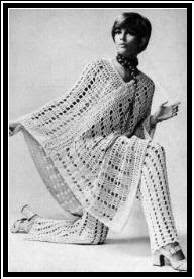
For groovy girls this on can be found here but I should warn you that the site is full of fantastic vintage patterns and you may be distracted for some time....

For example, from the same website! What says GLAMOUR more than a FABULOUS poncho with MATCHING pants????  Your link to looking like this is only a CLICK away....

And while we are on that website - did you ever consider the versatile nature of a poncho (I know I have!) It can be a poncho....or a skirt! You could probably even wear it on your head!


Here is the pattern for this glorious pineapple lace poncho/skirt

Here's more for the little girls. This Little Red Riding Hood capelet is upping the cute factor somewhat. The pattern can be downloaded for free from Red heart
http://www.redheart.com/free-patterns/red-riding-hood-wolf
And this cape "for a princess" is also from red heart - download and print! I do love a cape with a collar. For a short cape or "capelet" I like this one.
This ripple pattern capelet could be made in chevron stripes for a more modern look and the pattern is from Suzie's Yarnie Stuff Blog


I'm thinking of making this one with the matching beret. Pattern can be found here on all crafts blog.

For some quick short capes and ponchos look no further than the free patterns on Lion Brand. You do have to register to get the patterns. Here are some of my favourites I found there.

 The "round yoke poncho" Pattern #: L10716

 The "Split collar capelet" Pattern #: L32421


For all you Australian crochet people you will need to convert the pattern.  Here are all the conversions you should need! Get hooking! 

Here is a hook conversion table:

Crochet Hook Conversion Chart
MetricUSA  UK  
2.00 mm - 14
2.25 mm1 / B13
2.50 mm-12
2.75 mmC11
3.00 mm - 11
3.25 mmD10
3.50 mm4 / E9
3.75 mmF-
4.00 mm68
4.25 mmG-
4.50 mm77
5.00 mm8 / H6
5.50 mm9 / I5
6.00 mm10 / J4
6.50 mm10 1/2 / K3
7.00 mm-2
8.00 mm-0
9.00 mm15 / N 00
10.00 mm P 000
15.75 mm or 16mm Q -
Steel Hook Chart (thread hooks)
MetricUSA UK 
.6 mm146
.75 mm13-
.70 mm125
.8 mm11-
1 mm104
1.15 mm9-
1.25 mm83
1.50 mm72.5
1.6 mm6-
1.7 mm5-
1.75 mm42
1.85 mm3-
1.95 mm2-
2 mm11
2.25 mm000
3 mm00-

Here is a stitch conversion table:
USUK
chain(ch)chain(ch)
single crochet (sc)double crochet (dc)
double crochet (dc)treble (tr)
half double crochet (hdc)half treble (htr)
triple crochet (trc)double treble (dtr)
slip stitch (sl st)slip stitch (sl st)

And here are some tips for wool weight conversions. Worsted weight translates to Australian 10 ply. DK weight is 8 ply and Sports weight is 5 ply.  

Standard Yarn Weight SystemNm (length per mass, SI (International System of Units))Yarn Type (US)Ply (UK, NZ, AU)[3]m/100gWraps Per Inch (WPI)[3]needles / circulars recommended, mm
0 or Lace6 - 8Thread, Cobweb and Lace1 - 3 ply600-80018+ wpi1.5 - 2.5
1 or Superfine4 - 6Fingering, Sock4 ply400-48014 wpi2 - 3
2 or Fine3 - 4Sport5 ply300-40012 wpi3 - 4
3 or Light2.4 - 3DK8 ply240-30011 wpi4 - 4.5
4 or Medium1.2 - 2.4Worsted10 ply120-2409 wpi4.5 - 5.5
5 or Bulky1 - 1.3Bulky12 ply100-1307 wpi5.5 - 8
6 or Super Bulky>1Super Bulky
Less than 1005-6 wpi>8

Monday, May 5, 2014

Free Crochet Cardi Pattern

Is it official yet? Is it officially cold? Should we pack away our sandals and our shorts? Sadly, I think so.
I am NOT a winter person. BUT! I am a crafty wool person and the cold weather does inspire the hook and needles to come out and get hooking and click clacking.


Here is a free pattern from lionbrand called "Flutter Baby Top"(You will need to make register with them to access their free patterns but it's worth it. There are heaps!)This jacket/cardi all made in one piece. Nifty huh?

The pattern is for sizes 3 months up to 4 years: made with Babysoft 5 ply and a 3.25 mm (or US F-5) (see picture from the pattern below) 
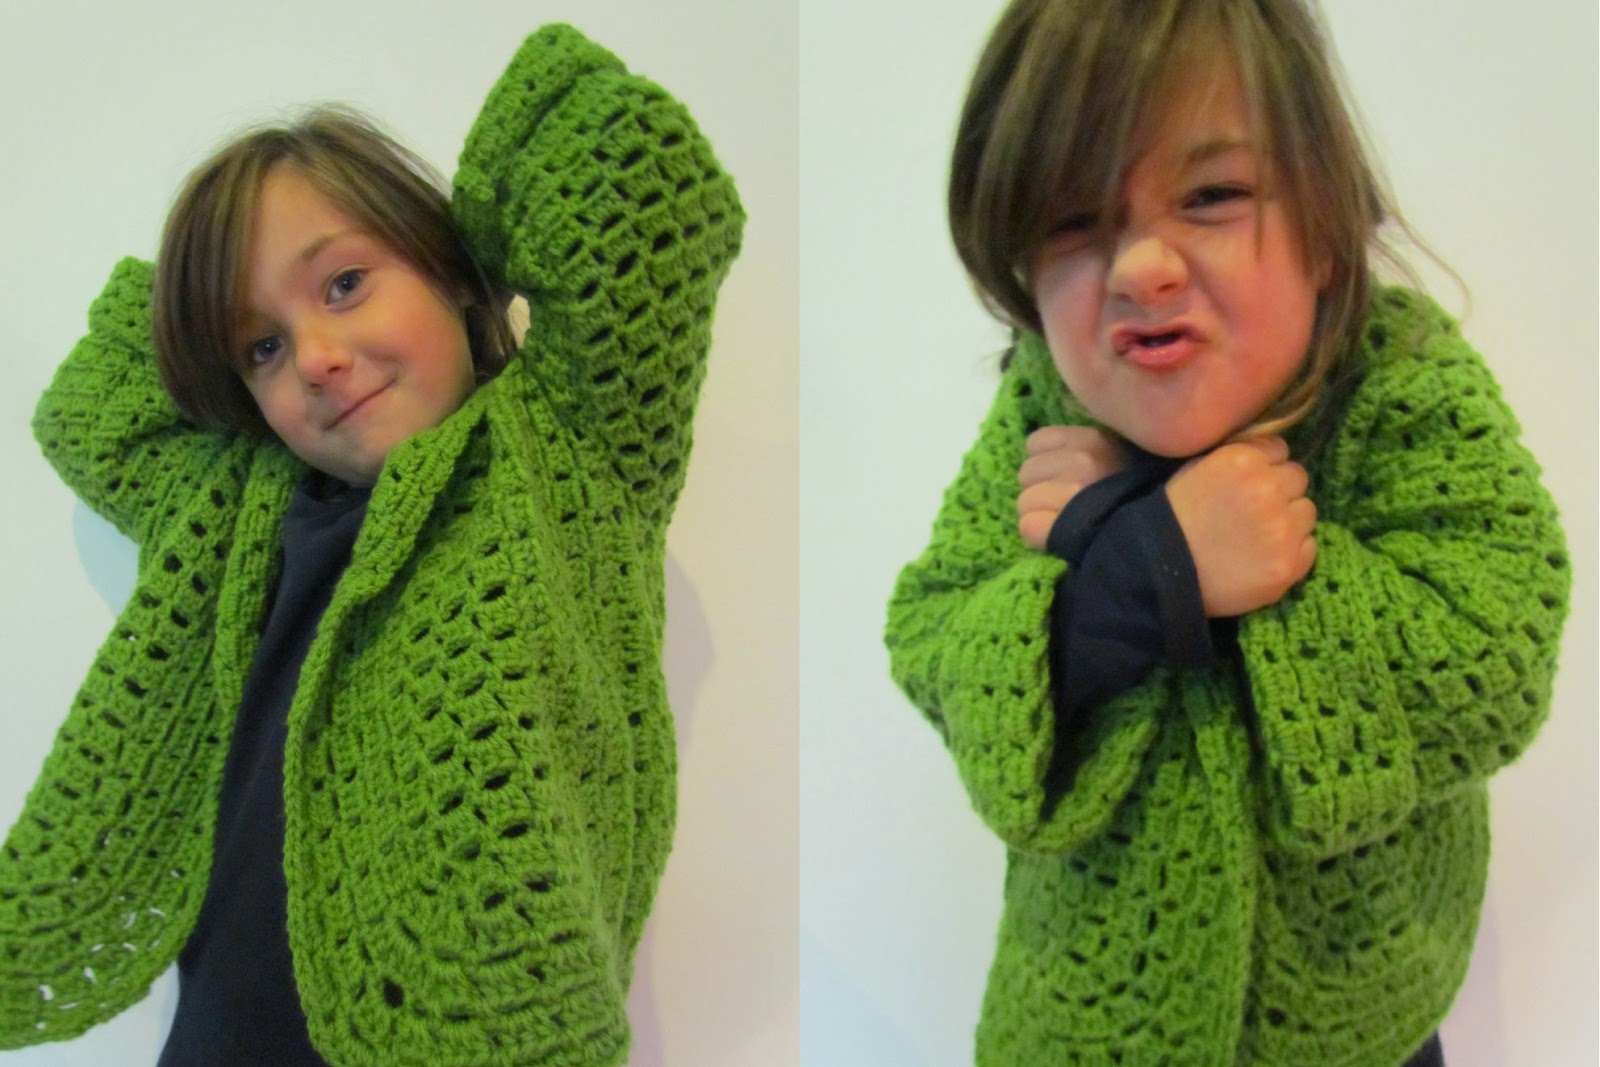
TO MAKE IT BIGGER: I used 8 ply and a a size 5 mm hook or (US  H-8) to make it for my daughter who is 6 years old. I added some rows to the length which I found was easy thanks to the diagram. It worked a treat!


(and its also fits me as a little 3/4 sleeve bolero.)
What woolies are you making for winter? Or are you in the Northern Hemisphere and crocheting cotton?


CROCHET HOOK SIZES AND CONVERSIONS
METRIC SIZES(mm)US SIZES UK/CANADIAN
2.0-14
2.25B/113
2.5-12
2.75C/2-
3.0-11
3.25D/310
3.5E/49
3.75F/5-
4.0G/68
4.577
5.0H/86
5.5I/95
6.0J/104
6.5K/10 1/23
7.0-2
8.0L/110
9.0M/1300
10.0N/15000

Tuesday, November 26, 2013

Trying this free online sewing pattern for girls


 This free peasant dress pattern for little girls from size 18 months to 6 years is really easy.

I made it as a short sleeve dress and added patch pockets and tie. I'll be making more of these! I've already made it as a little top for the twins - might try a long sleeve version next with side pockets....and yes, may even make one for myself...but I really must stop dressing like my 6 year olds!!!

Monday, July 1, 2013

fingerless mittens?


Fingerless mittens....well it's a funny phrase isn't it? Because, technically,all mittens are fingerless - and with these ones  you can see fingers!Confused? Hmmm. Let's call them hand warmers!!!!

I've been making them by the dozen. Literally. I've adapted a few patterns to come up with this quick easy pattern.


Hand warmers pattern

50 g 8 ply wool Size 4.5 mm (7) hook

SMALL: Chain 30 and join with slip stitch. (MEDIUM chain 33, LARGE chain 36)

Row 1: Ch 2 (for first half treble) 1 half treble in each chain around the ring. Join to the chain half treble with a slip stitch.

Row2: sl st into half treble space. Ch 3 (for first mock treble) then tr into same space, ch 1 then 2 tr into same space. 1 shell made. Skip 2 ch, tr into next ch, skip 2 ch and shell (2 tr 1 ch 2 tr) into next ch. Continue in this pattern to the end. (5 shells) (MEDIUM AND LARGE FIT 6 SHELLS AROUND – doesn’t matter if you squeeze it in at the end)
Sl st into the 3rd ch of 1st mock tr

Row 3: Sl st into ch sp in shell. Ch3 (for first mock tr), 1 tr into same space, 1 ch and 2 tr into same space (a shell made)1 tr into top of 1 tr from the prev row. Continue around.

NOTE: if you want a longer cuff, insert more rows here before the increase.

Row 4: Increase row. Sl st in ch sp of shell. Ch 3 (1st mock tr) 5 tr into same space.1 tr into the top of previous row single tr, then shell (2 treble, 1 chain, 2 treble) into shell ch sp. Cont. pattern around the row. Join with slip stitch in 3rd ch of 1st mock tr

Row 5: Sl st in space between 2nd and 3rd tr. Ch 3 (mock tr), 1 tr 1 ch 2 tr  into same sp (1 shell made) ch 1 skip 2 treble then shell (2 tr 1 ch 2 tr) into space between 4th and 5th tr from increase. 1 tr into single tr from previous row, shell into space between shell from previous row. Continue pattern around. Join with a slip stitch into 3rd ch of 1st mock tr.

Row 6: sl st into shell sp. Ch 3 (to be 1st tr) 1 tr into same space, 1 ch 2 tr into same space (shell made. ) I tr into space between the 2 shells from previous row. Continue pattern around.


Continue in this pattern for at least 3 rows. If you want a longer thumb piece then do 4 or 5 rows.

Row 9: *Create the thumb: Ch 3. Skip 2 shells and join to the next single tr creating a space for the thumb. Ch 3 ( mock tr in the next row) and continue around, shell into the shell space from previous row (2 tr 1 ch 2 tr) until you get to the edge of the thumb space,ending with 1 tr. 
Skip one ch of the thumb divide, 1 shell in next ch, skip one ch and  join with a sl st in the 3rd chain of the first mock treble.

Row 10: Ch 3 (for 1st tr) Shell into the next shell space and continue around until the edge of thumb space, ending with the 1 treble.  Skip 1 treble, 2 treble in the next treble space, 2 tr in the next tr space, join with a slip stitch to the 3rd ch of the first mock tr.
You can finish off here for a short mitten or continue for a few more rows for a longer mitten.


You can finish off here for a short mitten or continue for a few more rows for a longer mitten.


Happy making! I will have this pattern as a hand out at my market stall next Saturday at the Winter Artisan Market at Northcote Town Hall, 10 am - 4 pm or you can buy a pair I have made for $20!

Saturday, January 26, 2013

free bag-tag pattern for back to school crafting

Now you would think that all the backpacks in this house would be adorned with hand made recycled felt bag-tags from our re-sew-cool range, wouldn't you? Well, ahem...cough....not exactly.

In fact, My kids wanted to design their own bag-tag (my designs not being quite good enough...)

Wanda has a cowgirl boot. Pepper wants a unicorn (I'm in the process of making it)and the little fella, Joe, wanted a dog that looked like his favourite toy dog, "Booey".


So I have made him this dog. It's not my usual style but I like him. And Joe really likes him!

Here's the template if you want to make a dog bag-tag too. For the swivel clasp you can recycle a lanyard.


He is simple to make:

1.decorate the face with a fringe, nose, mouth stitching and eyes. I used white shank buttons for eyes and a black permanent marker.

2.sew on swivel clasp to back of face. The fringe hides the stitches.

3.Sew head together, front and back, remembering to put the tongue in place.

4. Sew ears on around the front and back of head. Or simply both sides of the ears together and attach to the front of the head.


And remember - if you prefer one of our re-sew-cool bag-tag designs, enter our back to school giveaway!


Friday, September 21, 2012

In-tricky-ate crochet for Brain Health


This is my first attempt at an open work lace pattern crochet from this old well read book I inherited from my Mum.


I’m crocheting in fine yellow cashmere.Can you believe it has taken almost THIS many rows before I could FINALLY do it without referring to the book? I find the complexity of the pattern very therapeutic. It takes concentration and that in itself is meditative.It's good for the gaskets.

Dementia Awareness Week  starts today, with World Alzheimer's Day. The theme is Brain health - Making the connections. So I'm going to challenge my brain and try a new complex crochet pattern  (complex for me anyway!) each day.

Join in! What do you do to keep your brain active?

Here's today's pattern for Day 1:

Openwork stitch:

uses a multiple of 7+2

row 1: 2 ch *2h.tr, 3 ch, miss 2 sts, 1 dc, 3 ch, miss 2 sts* Finish row with 2 h.tr

row 2: 2 ch, * 2 h.tr, 3 ch, 1 dc in dc, 3 ch, 1 dc in same dc, 3 ch* Finish row with 2 h.tr

row 3: 1 ch, 1 dc in each h.tr of previous row, *1 dc in 3 ch space, 5 ch, 1 dc in next ch space, 1 dc in each 2 h.tr*

row 4: 1ch, * 2 dc, miss 1 st, 7dc in 5 ch space, miss 1 st* Finish row with 2 dc

row 5: 2 ch *2 h.tr, 3 ch, miss 3 sts, 1 dc, 3 ch, miss 3 sts, * Finish row with 2 h.tr

row 6: REPEAT FROM ROW 2